
Zoho allows you to create different types of custom fields that can be mapped and applied when using your Wherehouse integration. These fields are useful for setting up specific rules or passing unique data between Zoho and your connected sales channels.
For example:
- A Check Box custom field called “Do Not Sync” – that can tell Wherehouse not to sync selected products from Zoho to your sales channel.
- An Amount custom field called “Takealot Price” – lets you set a custom price in Zoho that Wherehouse will sync to Takealot instead of using the standard Zoho Selling Price.
Adding a Custom Field in Zoho
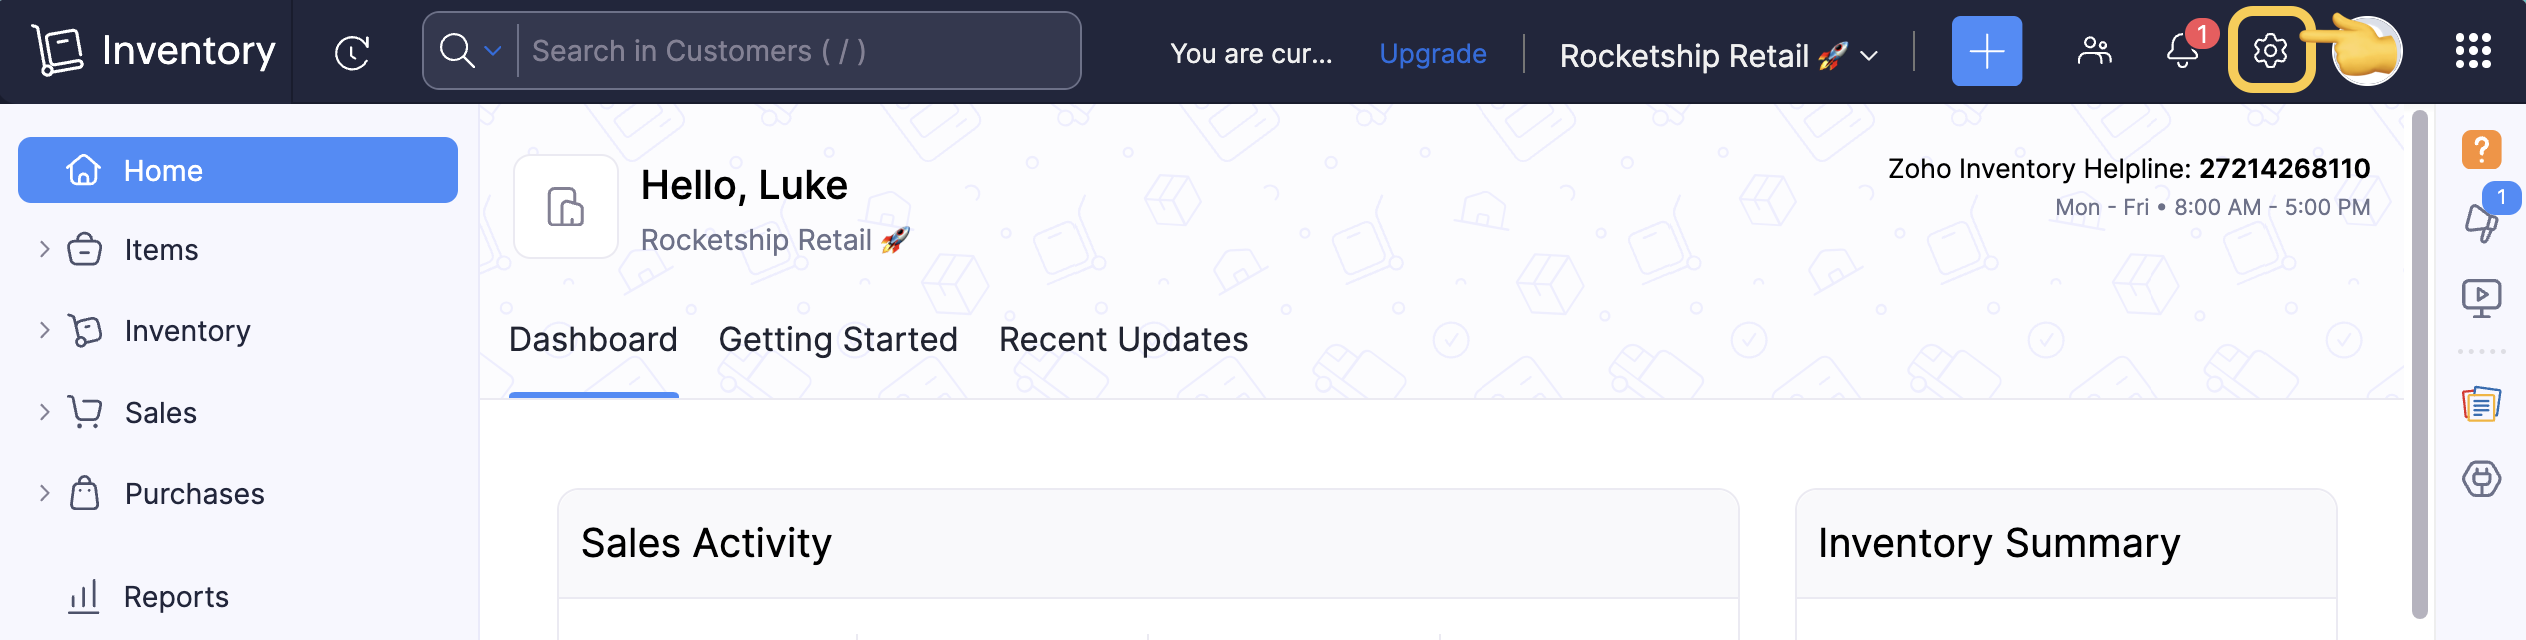
1️⃣ Click the ⚙️ Settings icon (top-right corner).
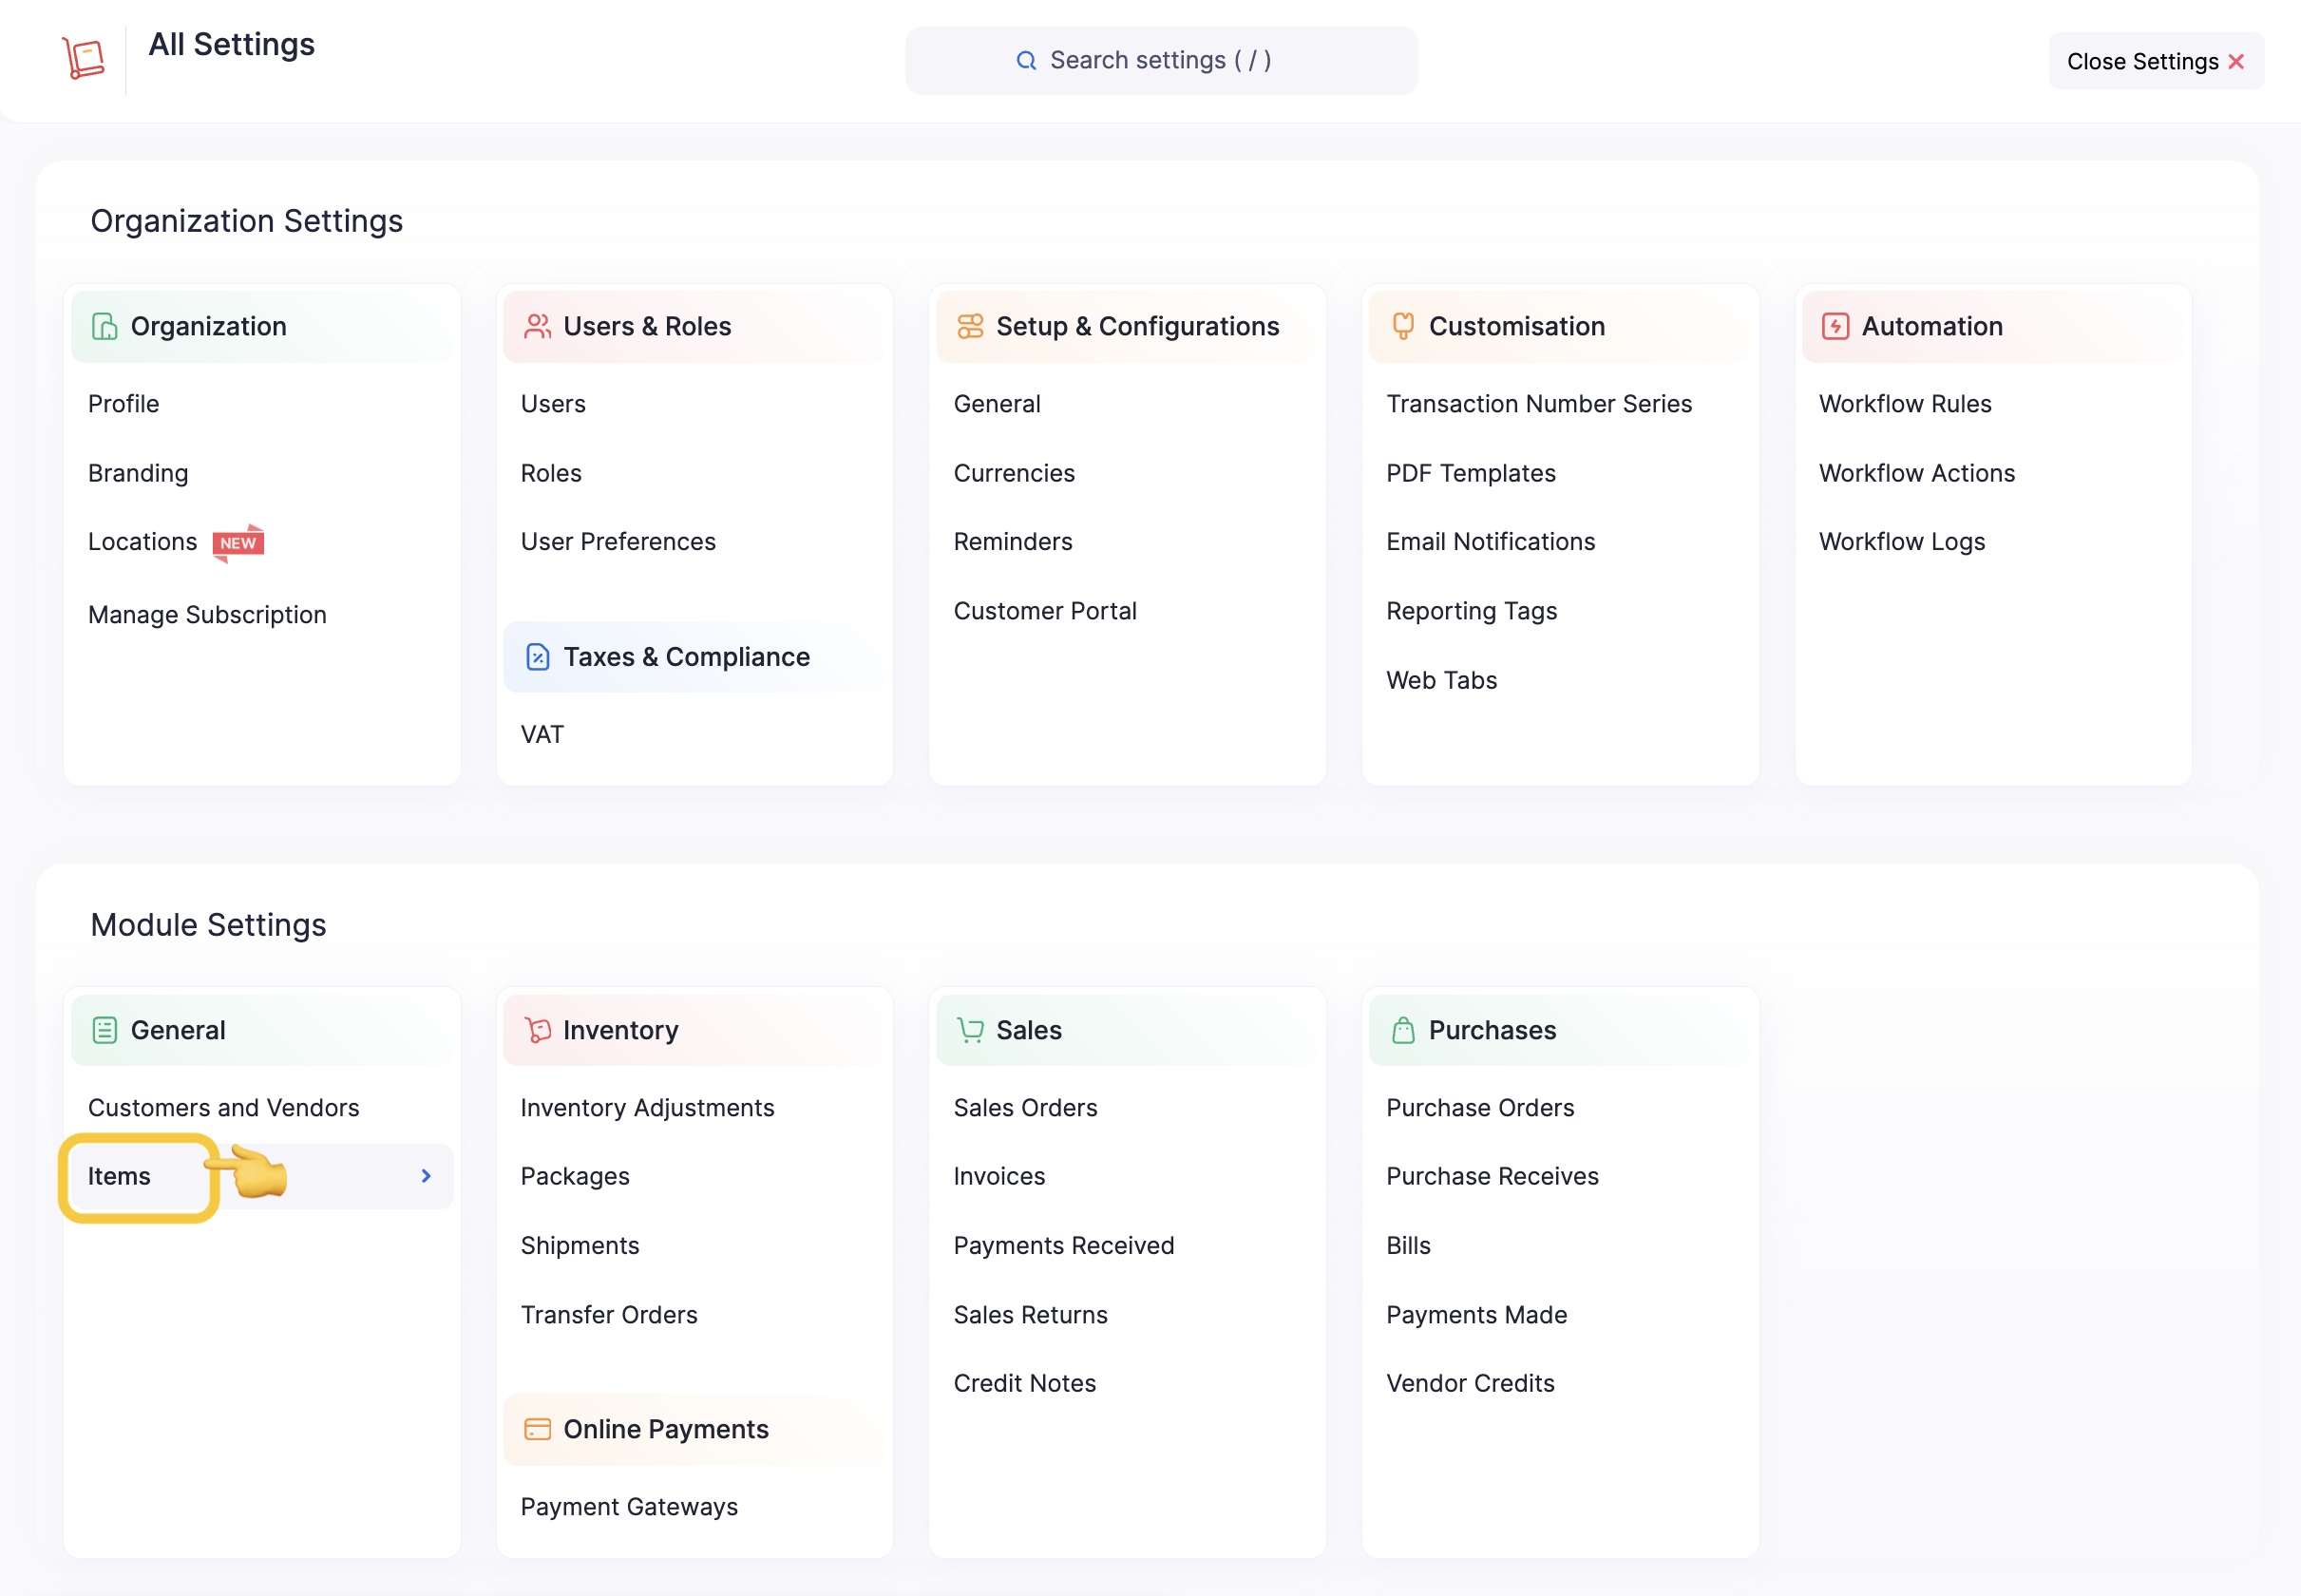
2️⃣ Go to Module Settings > General > Items.
3️⃣ Select the Field Customization tab.
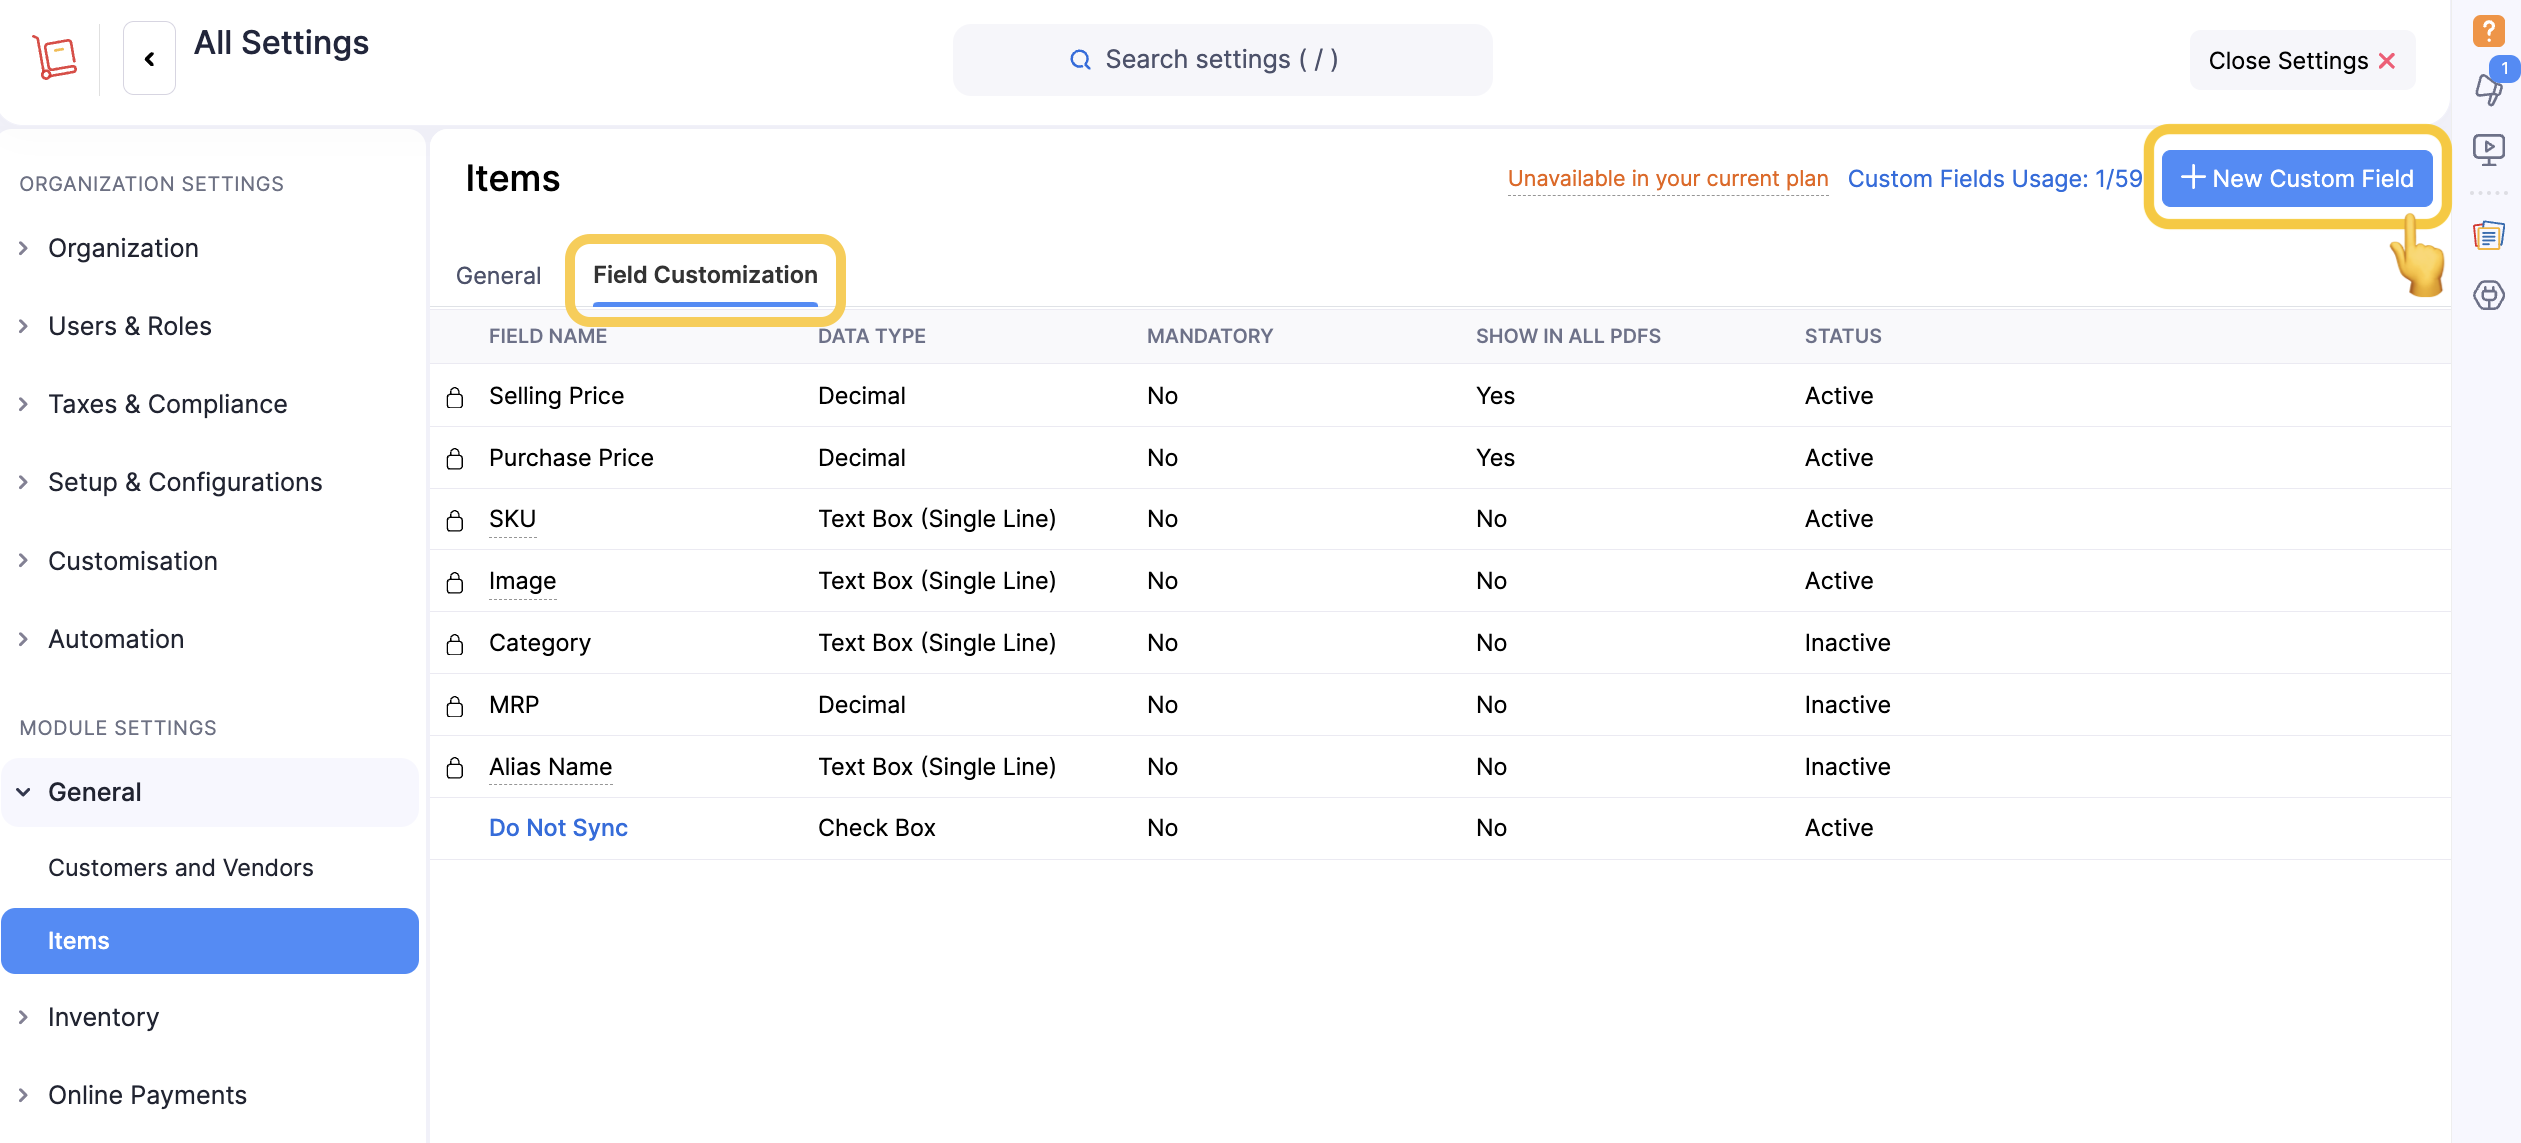
4️⃣ Click + New Custom Field (top-right corner).
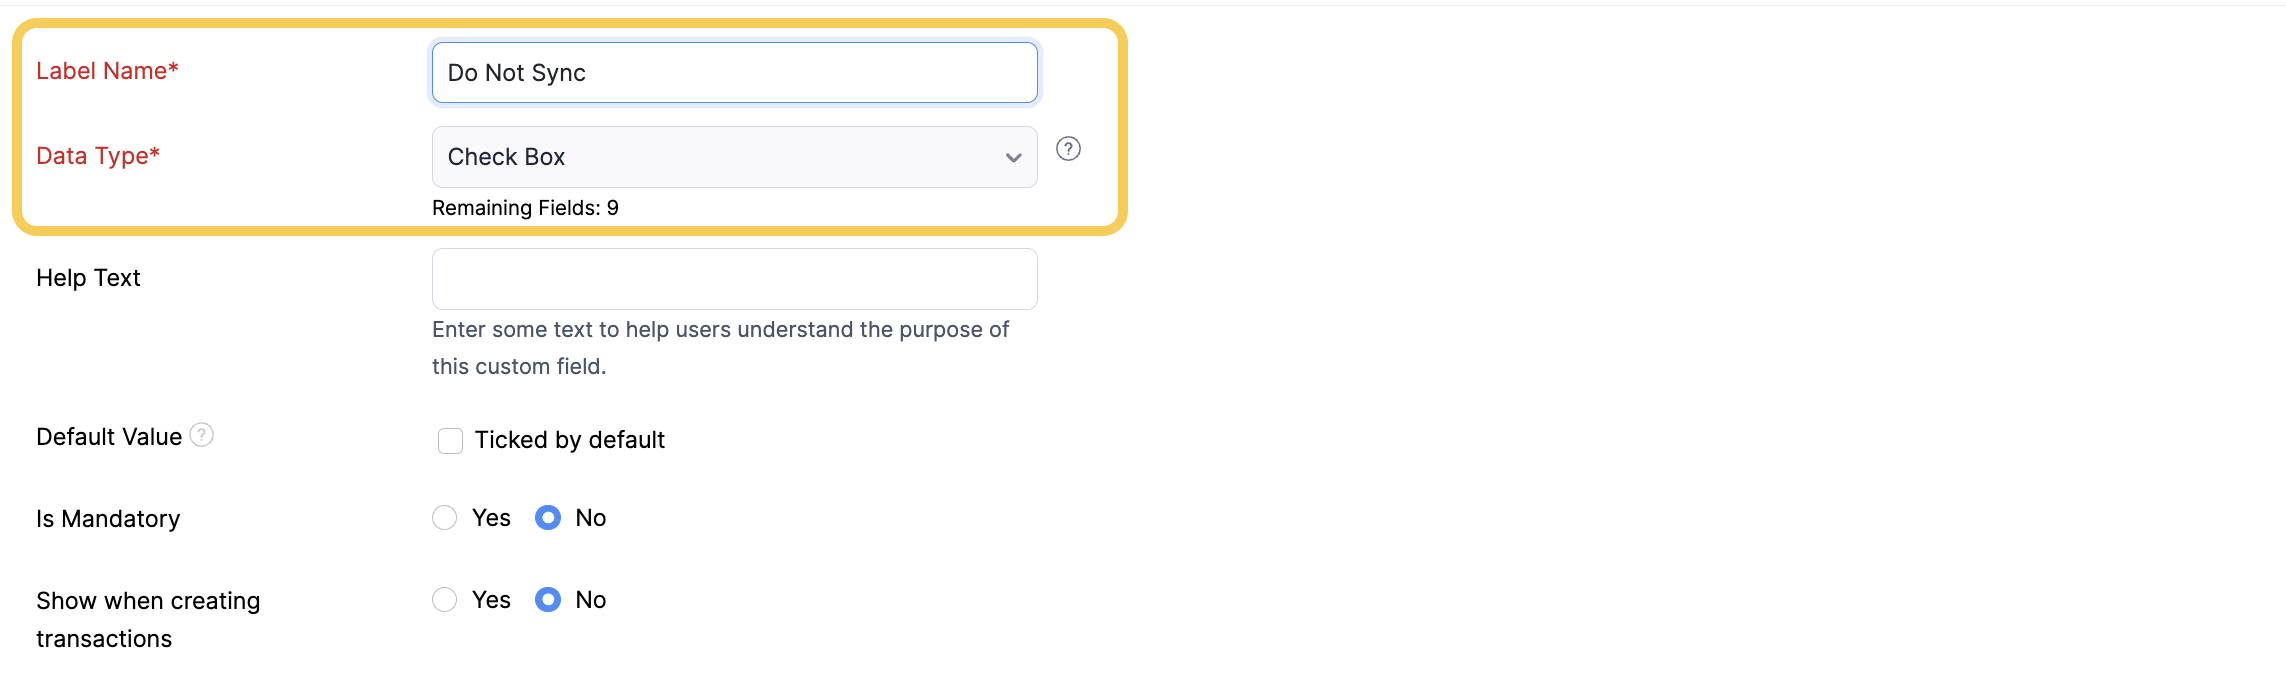
5️⃣ Enter your field details:
Example 1:
For a Check Box custom field (e.g Do Not Sync) that can tell Wherehouse not to sync selected products from Zoho to your sales channel.
- Label Name: Use a clear and descriptive name (e.g. “Do Not Sync”).
- Data Type: Choose the correct type for your data (e.g. Check Box).
Example 2:
For an Amount custom field (e.g. Takealot Price) that lets you set a custom price in Zoho that Wherehouse will sync to Takealot instead of using the standard Zoho Selling Price.
- Label Name: Use a clear and descriptive name (e.g. “Takealot Price”).
- Data Type: Choose the correct type for your data (e.g. Amount).
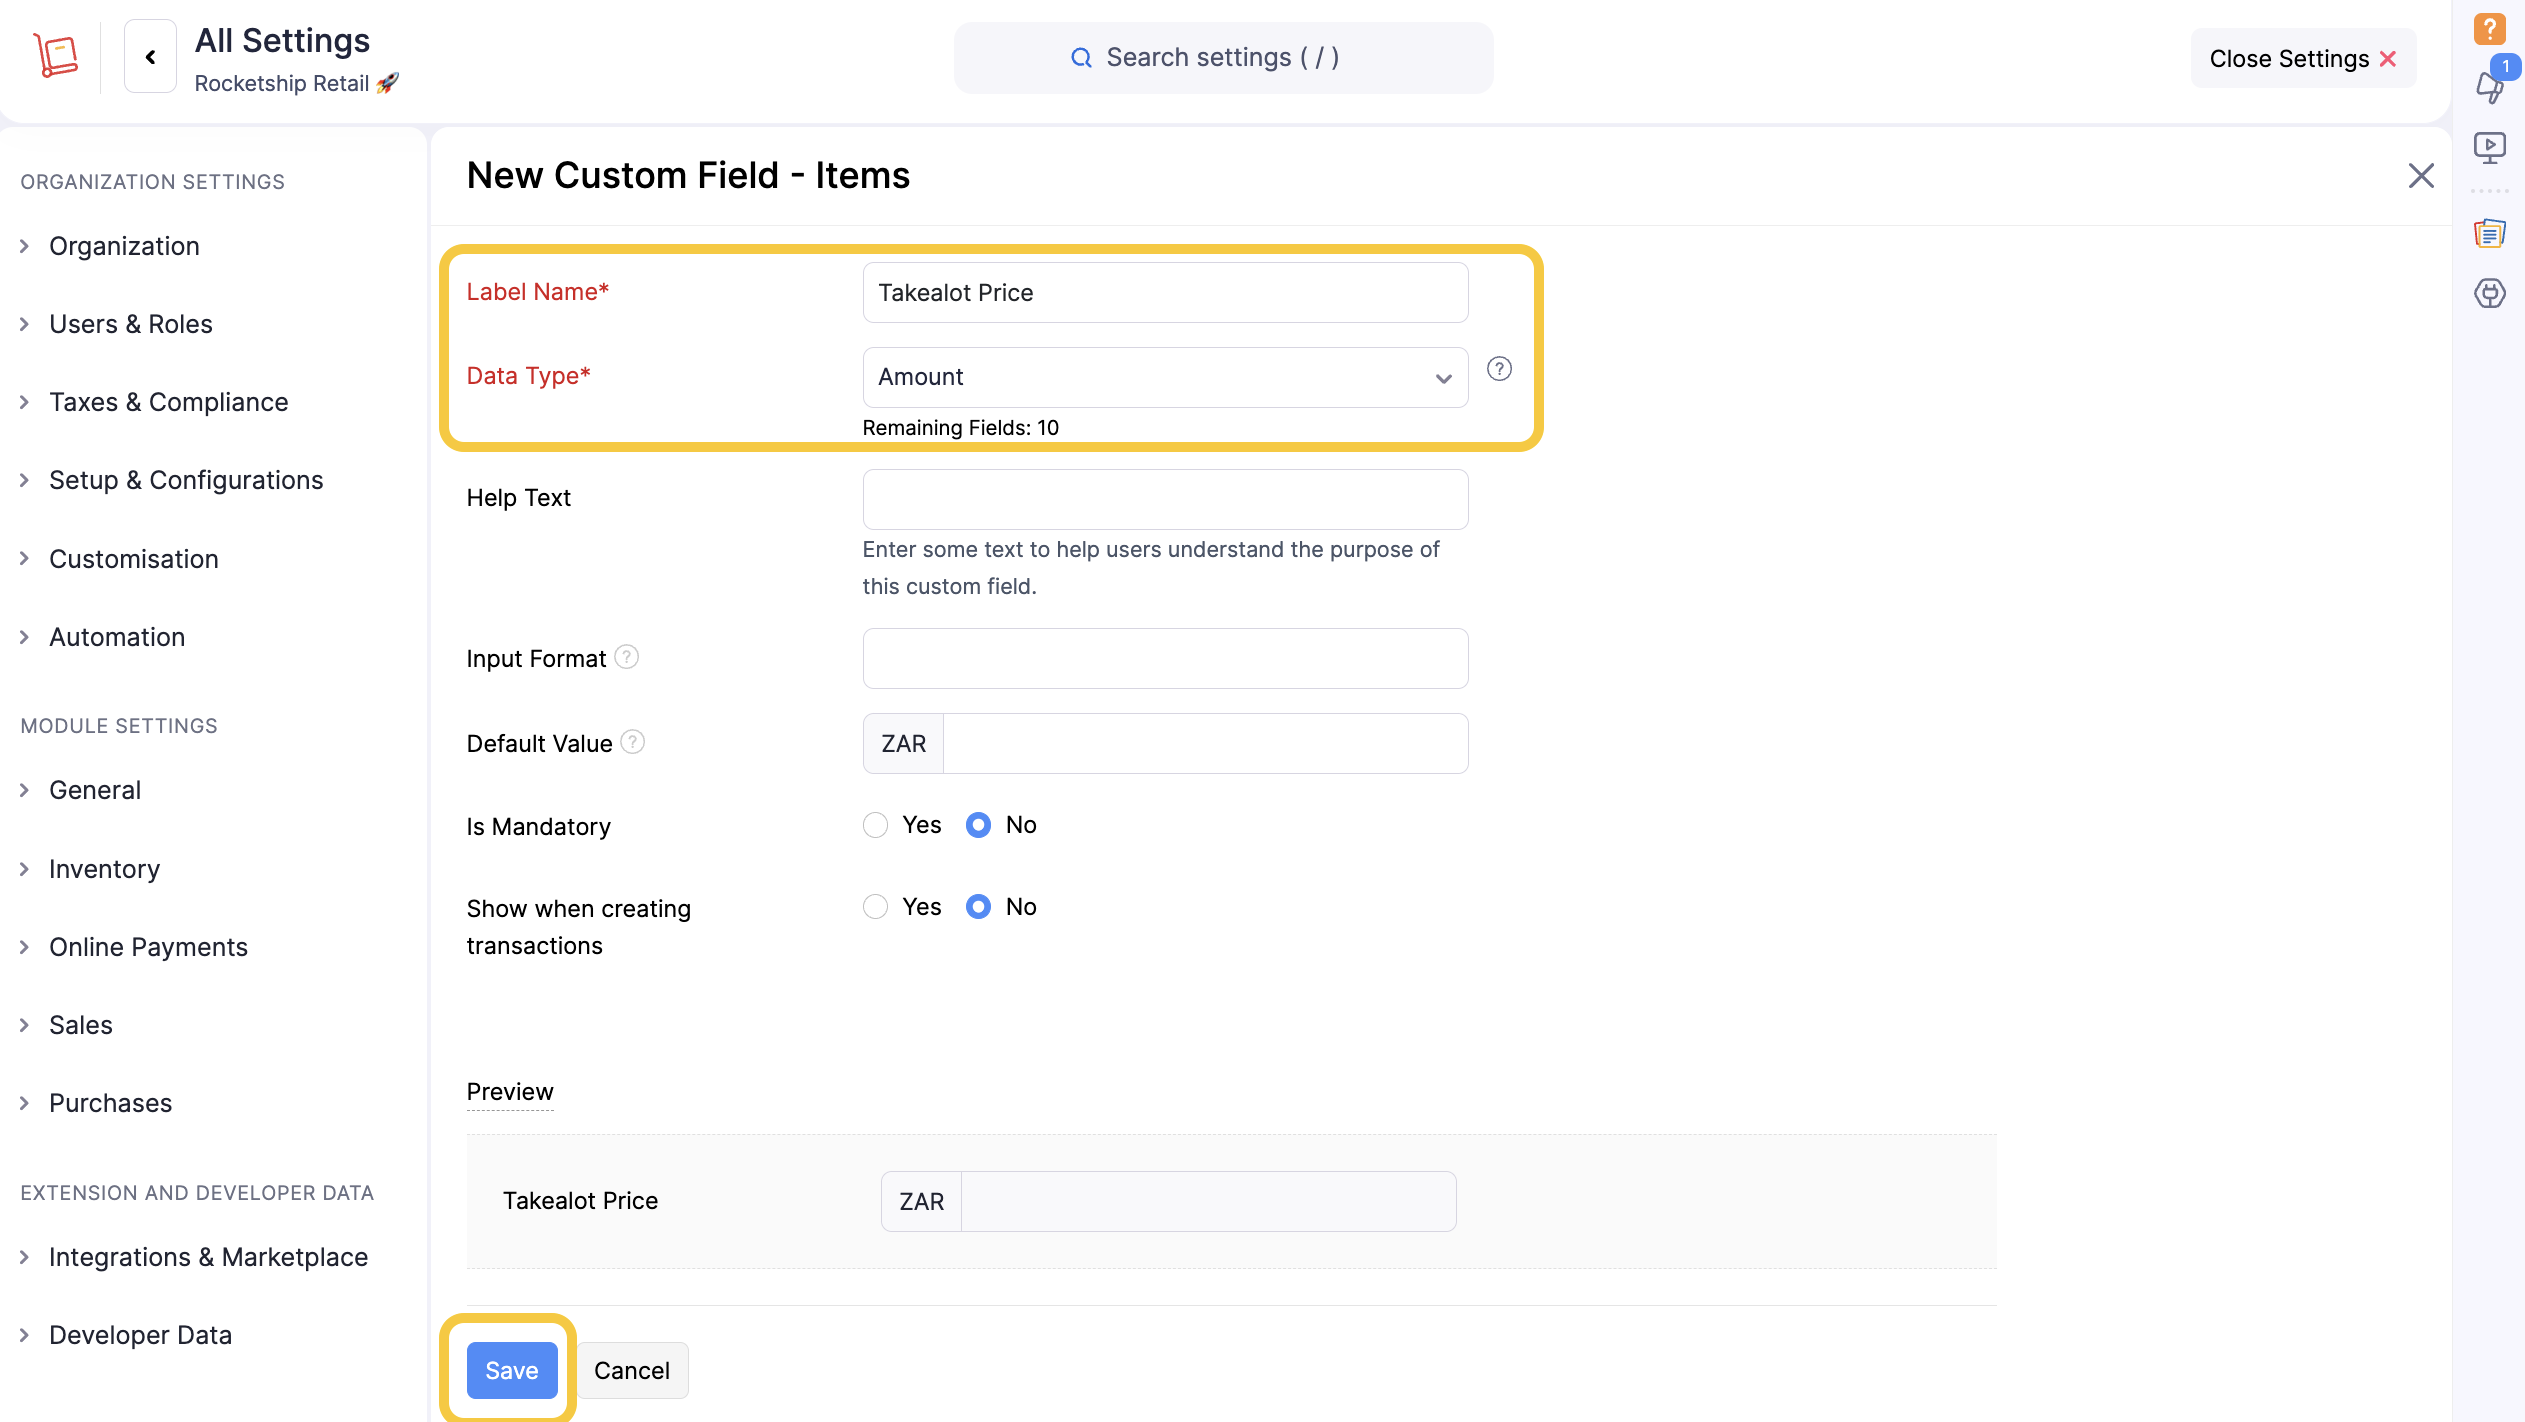
6️⃣ Click Save to create your custom field.
Your new custom field will now appear in the selected module’s layouts and forms.
Entering Data Into Your Custom Field
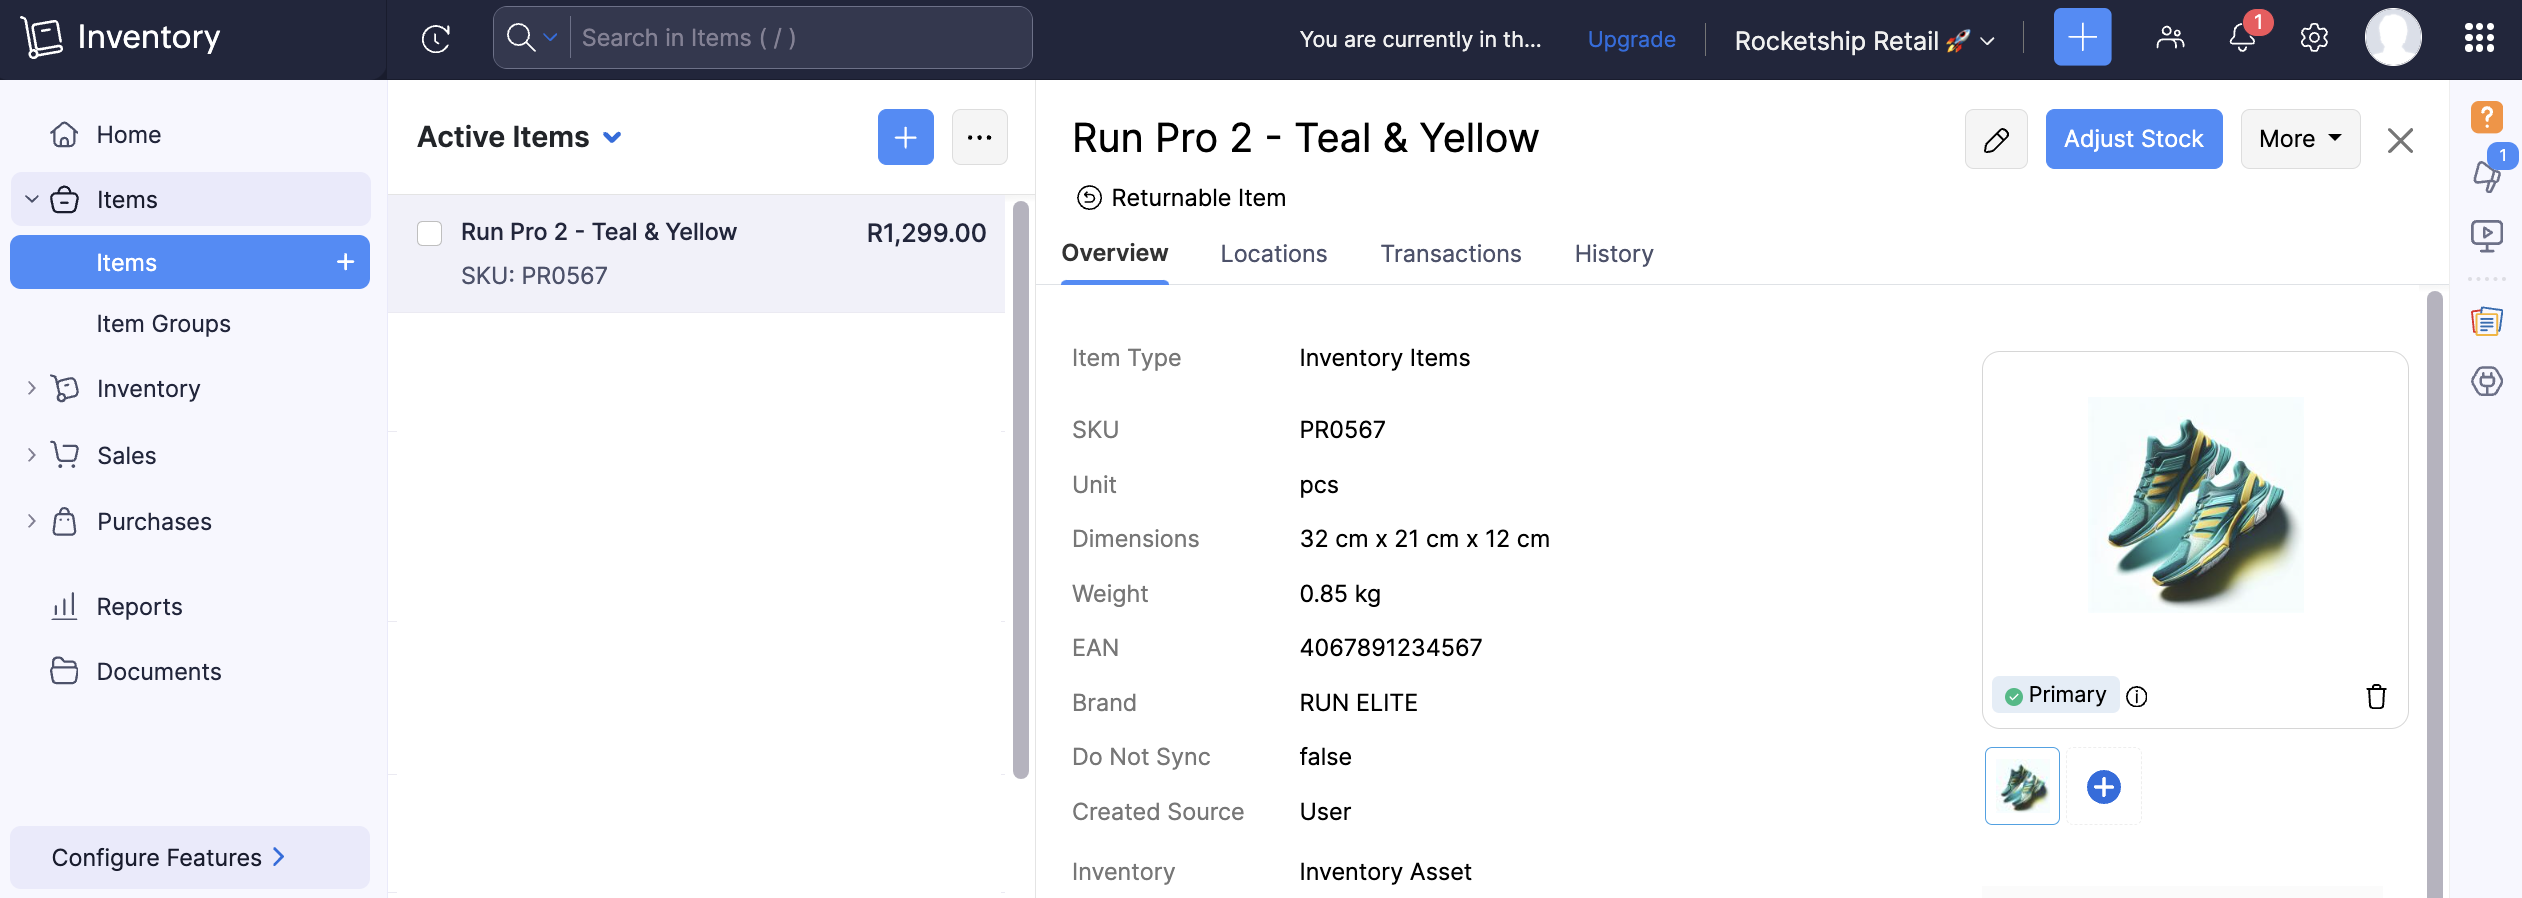
1️⃣ Open the Item you want to update.
2️⃣ Click the ✏️ Edit Item button (top right)
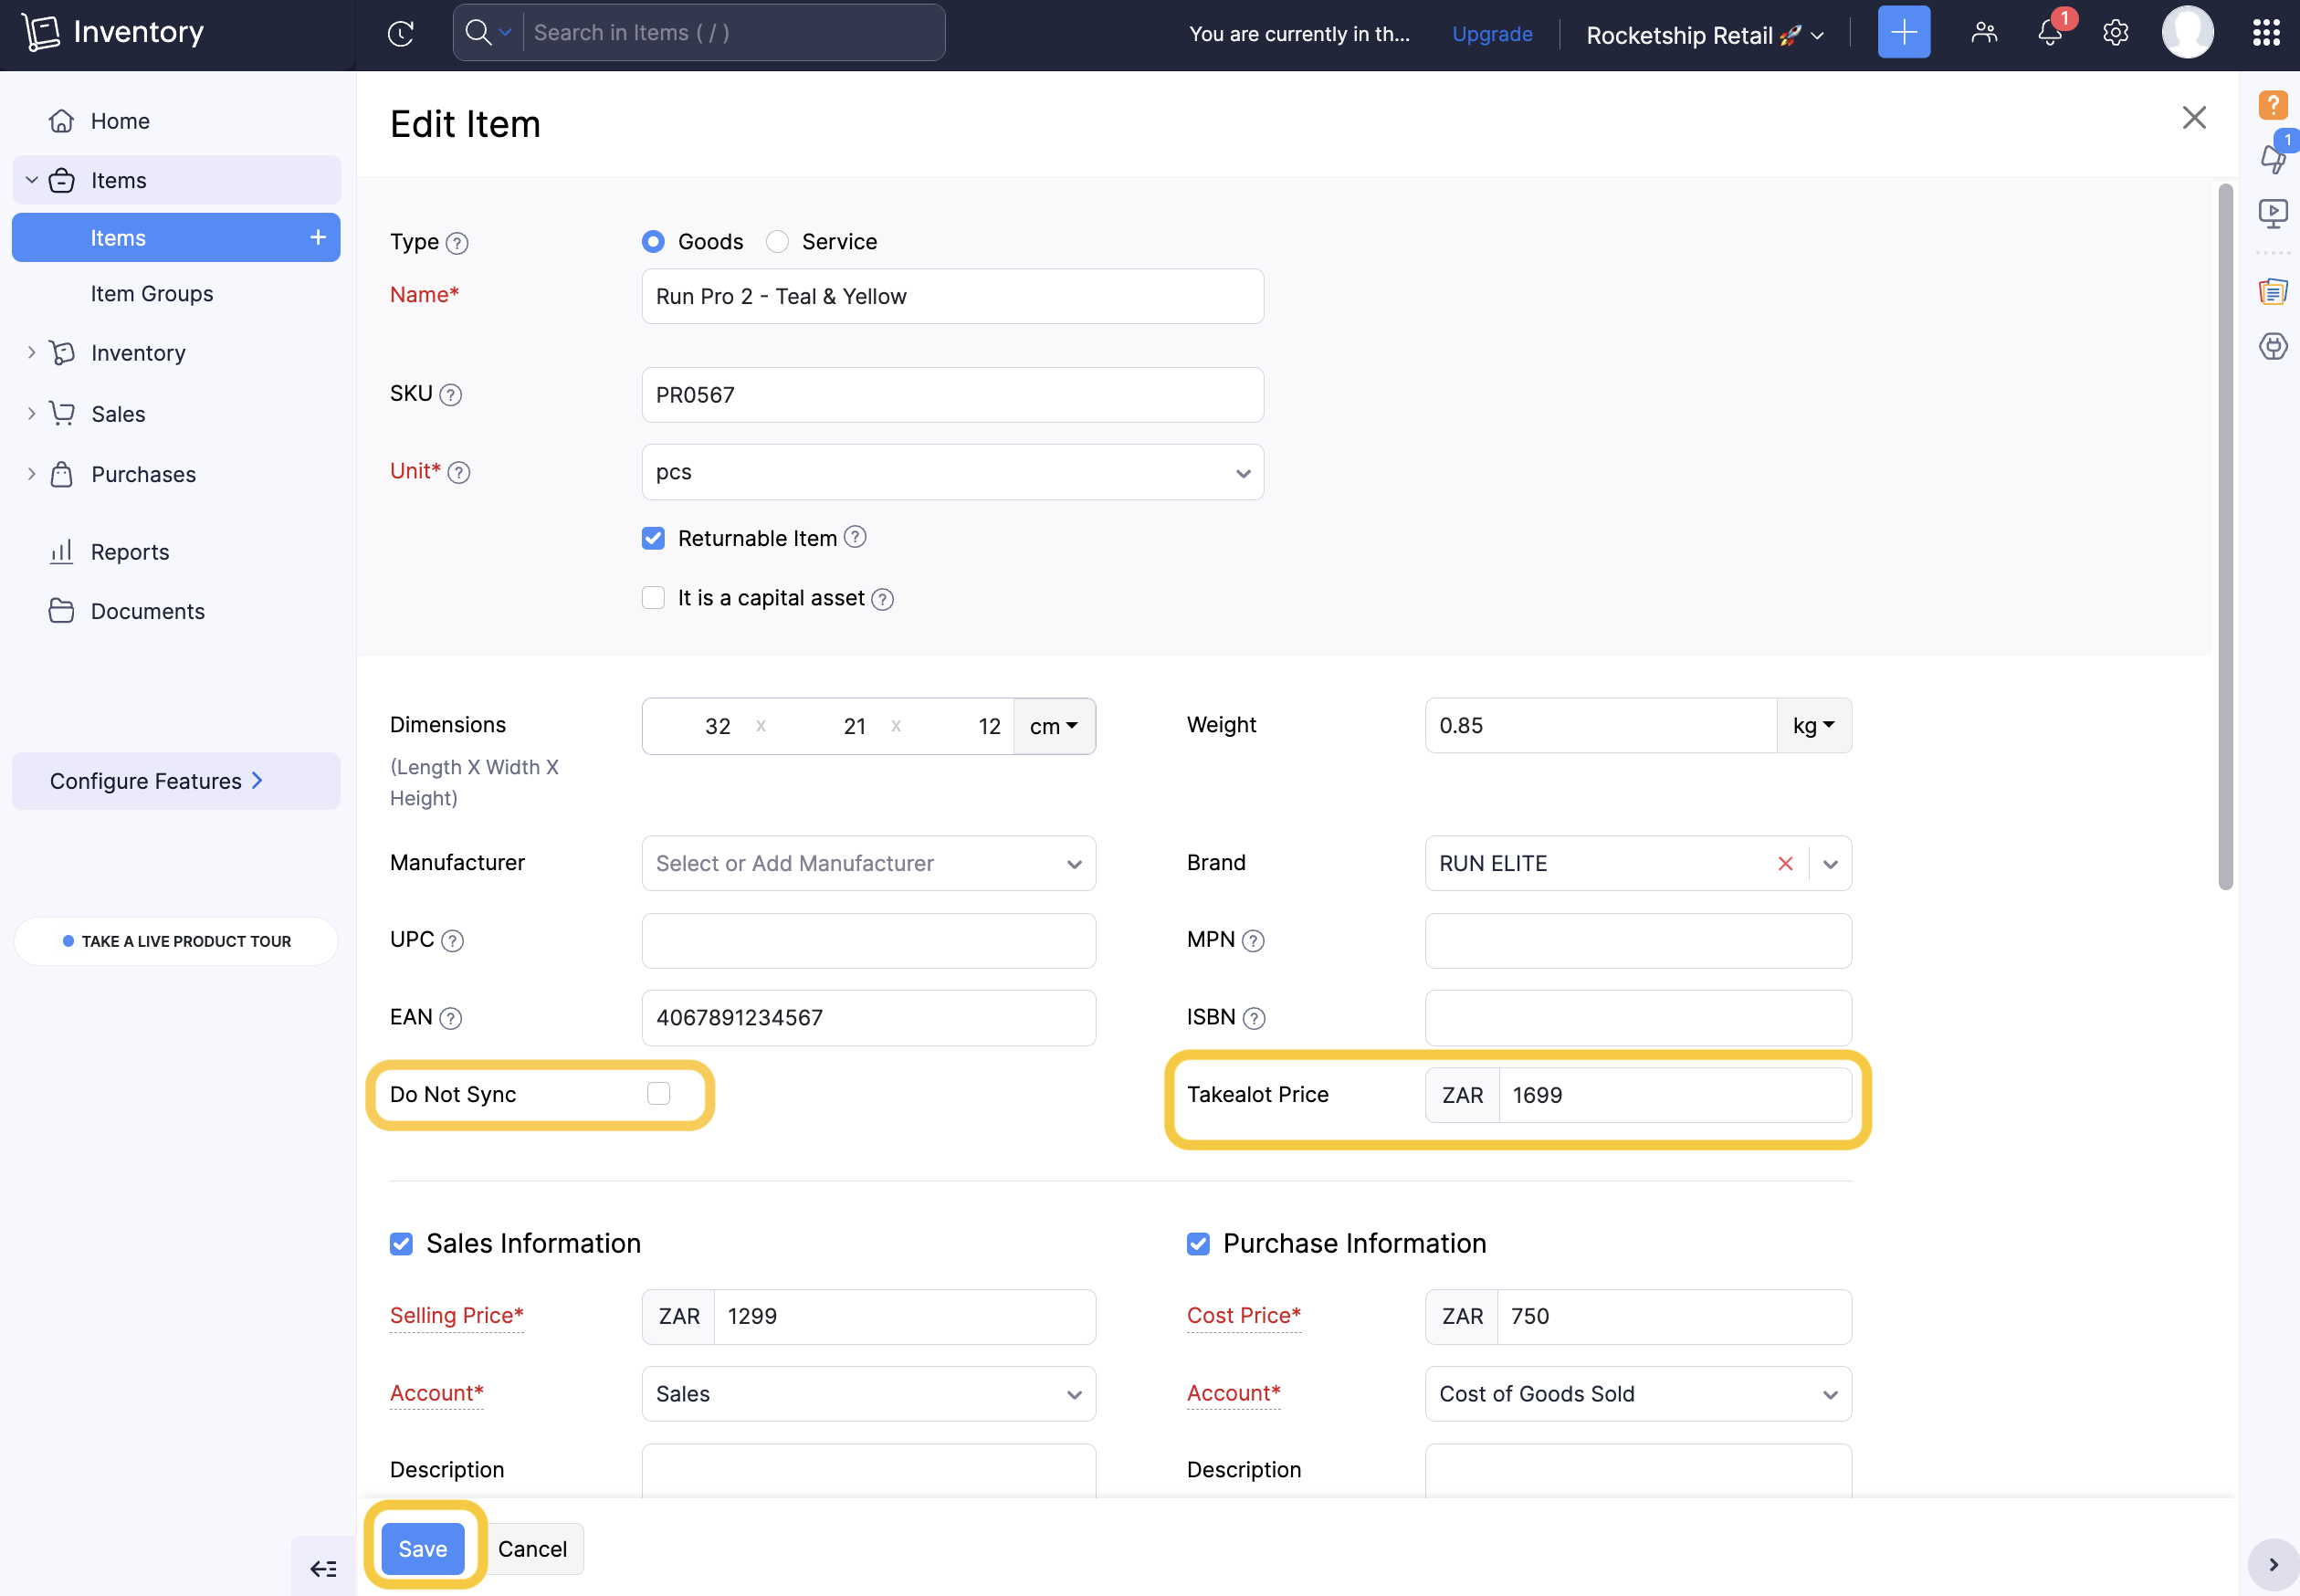
3️⃣ Locate your custom field (e.g. “Do Not Sync” or “Takealot Price”).
4️⃣ Tick the box or enter the required value.
5️⃣ Click Save (bottom left) to apply changes.
You’ve now set up and populated a custom field in Zoho.
Wherehouse can map this field to your chosen platform and apply your custom sync rules. Just reach out to your onboarding consultant to capture the relevant rules for your account.